
What Hardwood Floor Installation Really Involves, and Why the Process Matters More Than the Product
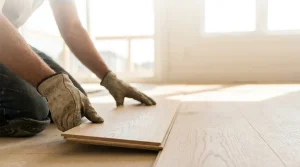
Here is something most homeowners only learn after the fact: the plank you pick at the showroom is maybe a third of what determines how your floor looks and performs ten years from now. The rest comes down to how the floor is installed, who installs it, and what happens to the subfloor before a single board goes down.
Professional Hardwood Floor Installation is a system, not a single task. It starts with moisture testing, moves through subfloor preparation and acclimation, and only then gets to the part everyone pictures, the actual laying of solid hardwood or engineered wood flooring. Skip or rush any stage and the floor tells on you later, through cupping, gapping, squeaks, or boards that lift at the seams.
This guide walks through the entire process the way a flooring contractor actually approaches it. We will cover the difference between solid and engineered wood, how to choose a wood species, which installation method fits your home, what proper subfloor prep looks like, how Pennsylvania’s climate affects wood movement, and how to keep your new hardwood floors beautiful for decades.
Whether you own a stone colonial in Gladwyne, a townhome in Royersford, or a mid-century ranch in Wayne, the principles are the same. The details, especially around moisture and humidity in Southeastern Pennsylvania, are where local experience earns its keep.
Solid vs. Engineered Hardwood Flooring: Which One Belongs in Your Home?
Before anything else gets decided, this question has to be answered, because it drives every other choice, from the installation method to which rooms are even candidates for wood.
Solid hardwood flooring is exactly what it sounds like, a single piece of wood, typically three-quarters of an inch thick, milled with a tongue and groove profile. It can be sanded and refinished many times over its life, which is why solid oak floors from the 1920s are still underfoot in older Main Line homes today.
Engineered hardwood flooring is built in layers. A real hardwood veneer, called the wear layer, sits on top of a cross-laminated plywood or high-density core. That cross-grain construction makes the plank far more dimensionally stable, meaning it expands and contracts less when humidity swings, which it absolutely does in Pennsylvania between a muggy July and a dry, furnace-heated January.
Neither product is “better” in the abstract. The right answer depends on where the floor is going, what sits underneath it, and how long you plan to live with it.
Solid vs. Engineered Hardwood Comparison Table
| Factor | Solid Hardwood | Engineered Hardwood |
|---|---|---|
| Construction | One solid piece of wood | Hardwood wear layer over a plywood core |
| Typical thickness | 3/4 inch | 3/8 to 3/4 inch |
| Refinishing potential | Many times over its lifespan | 1 to 3 times, depending on wear layer thickness |
| Moisture stability | More sensitive to humidity swings | Highly stable, resists seasonal movement |
| Below-grade use (basements) | Not recommended | Suitable with proper moisture control |
| Over concrete slabs | Rarely appropriate | Commonly installed with glue-down or floating methods |
| Over radiant heat | Limited compatibility | Many products approved by manufacturers |
| Expected lifespan | 50 to 100+ years with care | 20 to 40+ years depending on wear layer |
| Best fit | Above-grade rooms over wood subfloors | Basements, concrete slabs, wide planks, radiant heat |
When Solid Hardwood Is the Right Call
If your home has a traditional plywood subfloor on the first or second story, and you want a floor that can be renewed by sanding for generations, solid wood remains the gold standard. It is the natural choice for restoring character in older homes throughout Montgomery County, where matching existing red oak floors is a common request.
Solid wood also gives you the most flexibility down the road. Changing tastes in 2040? Sand it, restain it, and the same floor becomes something entirely new.
When Engineered Hardwood Wins
Engineered flooring earns its place anywhere moisture or substrate conditions would punish solid wood. That means finished basements, additions built on concrete slabs, condos with concrete decks, and any room with radiant floor heating.
It is also the smarter platform for today’s popular wide plank flooring. A seven-inch solid plank moves a lot across its width with the seasons. A seven-inch engineered plank barely flinches, which is why most premium wide-plank products on the market in 2026 are engineered by design.
Choosing the Right Wood Species for Your Hardwood Floors
Once the construction type is settled, the fun part begins, picking the wood itself. Species selection affects hardness, grain character, color range, how the floor takes stain, and how it handles kids, dogs, and dropped cast-iron pans.
A useful reference here is the Janka hardness rating, an industry test that measures how much force it takes to embed a steel ball halfway into a board. Higher numbers mean better dent resistance. It is not the only thing that matters, but it is a fair predictor of how a floor handles real life.
Popular Hardwood Species Compared
| Species | Janka Rating | Grain and Color Character | Best Suited For |
|---|---|---|---|
| Red Oak | 1290 | Warm tones, pronounced grain, takes stain evenly | Whole-home installs, matching existing floors |
| White Oak | 1360 | Cooler tones, tighter grain, water-resistant tannins | Modern looks, kitchens, high-traffic areas |
| Hard Maple | 1450 | Light, clean, subtle grain | Contemporary spaces, brighter rooms |
| Hickory | 1820 | Dramatic color variation, rustic character | Busy households, pets, farmhouse styles |
| American Walnut | 1010 | Deep chocolate browns, luxurious figure | Bedrooms, dens, formal spaces with lighter traffic |
| American Cherry | 950 | Reddish hues that deepen with sunlight | Traditional interiors, lower-traffic rooms |
| Ash | 1320 | Bold grain similar to oak, blonde palette | Scandinavian-inspired and light interiors |
White Oak: The 2026 Favorite, and For Good Reason
If there is one species dominating design boards in 2026, it is white oak. Its neutral, slightly cool undertone works with natural and light stains that would turn pink on red oak. Its closed grain structure also makes it more resistant to moisture than its red cousin, which is one reason white oak shows up so often in kitchen flooring projects.
We install a lot of white oak in renovated homes around Villanova and Wynnewood, where homeowners want that clean European-inspired look without giving up the durability of domestic hardwood.
Grain, Cut, and Grade: The Details That Change Everything
Two floors of the same species can look completely different depending on how the log was sawn and graded. Plain sawn boards show the familiar cathedral grain. Rift and quartered boards display straight, linear grain with beautiful ray fleck, and they are also more dimensionally stable.
Grade matters too. Select grade gives you a uniform, clean appearance. Character grade, sometimes called rustic grade, embraces knots and mineral streaks for a lived-in feel. Neither is higher quality than the other structurally, they are simply different aesthetics at different price tiers.
Hardwood Flooring Installation Methods Explained: Nail-Down, Glue-Down, and Floating
How the floor attaches to your home matters as much as what the floor is made of. There are three primary installation methods, and the right one depends on your subfloor, the product you chose, and the conditions of the room.
Nail-Down Installation
The traditional method, and still the standard for solid hardwood over wooden subfloors. Each board is fastened with flooring cleats or staples driven at an angle through the tongue, hidden by the next board. Done correctly over a flat, dry, properly fastened plywood subfloor, a nail-down floor is quiet, solid underfoot, and built to last generations.
The craft is in the details, correct fastener spacing, proper expansion gaps at every wall, and racking the boards so end joints stagger naturally instead of forming distracting patterns like H-joints or stair steps.
Glue-Down Installation
With glue-down installation, planks are set into a full spread of urethane flooring adhesive, most often over a concrete slab. This is the workhorse method for engineered hardwood in basements, on slab-built additions, and in condo buildings.
Modern adhesives do double duty in 2026, many premium systems combine bonding with a built-in moisture barrier, protecting the wood from vapor rising through the slab. Trowel selection, adhesive open time, and slab flatness tolerances make this the least forgiving method for DIY, and the one where professional experience pays off most visibly.
Floating Floor Installation
A floating floor attaches to nothing below it. Planks click or glue to each other over an underlayment pad, and the whole assembly “floats” as one unit, expanding and contracting freely. It is fast, works over many existing surfaces, and pairs well with certain engineered click-lock products.
The trade-offs are feel and sound. Floating floors can feel slightly hollow underfoot compared to nailed or glued installations, which is why underlayment quality matters so much with this method.
Installation Method Selection Table
| Method | Works With | Typical Substrate | Key Advantage | Key Limitation |
|---|---|---|---|---|
| Nail-down | Solid and engineered | Plywood or OSB subfloor | Permanent, solid feel, time-tested | Not for concrete slabs |
| Glue-down | Engineered (and some solid) | Concrete slab, plywood | Quiet, stable, integrated moisture protection | Demanding prep and technique |
| Floating | Click-lock engineered | Almost any flat surface | Speed, flexibility, easy over concrete | Hollow feel without quality underlayment |
Subfloor Preparation: The Invisible Work That Determines Everything
Ask any veteran installer what separates a floor that lasts fifty years from one that fails in five, and the answer is almost always the same, subfloor preparation. It is the part of the project nobody sees at the end, and the part that decides whether everything above it succeeds.
A proper subfloor evaluation checks three things, flatness, structural soundness, and moisture. Industry standards call for the substrate to be flat within roughly 3/16 of an inch over a 10-foot span. That sounds forgiving until you put a straightedge on a typical 60-year-old subfloor in a Delaware County twin and watch the gaps appear.
Before installation day, a thorough prep process includes:
- Fastening and silencing the existing subfloor, screwing down loose panels to eliminate squeaks before they get sealed under new wood
- Flattening high and low spots, by sanding ridges and filling dips with cementitious leveling compound
- Repairing or replacing damaged sections, including water-stained or delaminated panels
- Verifying moisture content, of both the subfloor and the flooring itself with calibrated meters
- Installing the correct vapor retarder or underlayment, matched to the installation method and substrate
Skipping this stage does not save money, it defers cost. Every hump telegraphs through the finished floor, every soft spot becomes a squeak, and every moisture surprise becomes a warranty dispute. If your project needs significant leveling or structural correction, dedicated subfloor preparation should be scoped as its own phase, not squeezed into installation morning.
Moisture, Acclimation, and the Pennsylvania Climate Factor
Wood is hygroscopic, a fancy way of saying it constantly absorbs and releases moisture to match its environment. Understanding this single fact explains almost every hardwood problem you have ever seen, and it is where regional knowledge becomes genuinely valuable.
Southeastern Pennsylvania runs humid in summer and bone dry in winter once heating systems kick on. Indoor relative humidity in a Chester County home can swing from 60 percent in August to 25 percent in February if nothing manages it. Wood flooring responds to that swing by expanding and contracting, and the installation has to anticipate it.
What Proper Acclimation Actually Means
Acclimation is not just “leave the boxes in the house for a few days.” Real acclimation means bringing the flooring to equilibrium with the home’s normal living conditions, verified by moisture meter readings, not by the calendar. The HVAC should be running at typical settings, wet trades like painting and drywall should be finished, and the flooring’s moisture content should be within a tight range of the subfloor’s before the first board is fastened.
For solid hardwood, that subfloor-to-flooring moisture difference should generally be within about 2 percentage points for standard widths. Install outside that window and the floor will do the equilibrating after installation, on your dime, in the form of gaps or cupping.
Common Moisture-Related Problems and Their Causes
- Cupping, edges of boards raised higher than centers, almost always signals moisture entering from below, a wet basement or crawlspace, a slab without vapor protection, or a plumbing leak
- Crowning, centers higher than edges, often the aftermath of sanding a cupped floor before it fully dried
- Gapping, spaces between boards in winter, normal in small doses, excessive when flooring was installed too wet
- Buckling, boards lifting completely off the substrate, the extreme result of major water exposure with no room to expand
The takeaway is simple. Moisture management is not a step in the process, it is the process. Everything else in a quality hardwood floor installation exists to respect how wood and water interact.
Room-by-Room Guidance: Where Hardwood Works, and Where to Think Twice
One of the most common questions we hear during estimates is some version of “can I put hardwood there?” The honest answer varies by room, and it is worth walking through the house.
Living Rooms, Dining Rooms, and Bedrooms
These are hardwood’s home turf. Above grade, climate controlled, and free of plumbing, they are ideal for solid or engineered wood alike. Continuous flooring through these connected spaces also makes homes feel larger, one reason whole-first-floor installations have become the default request in open-concept renovations across the Main Line.
Kitchens
Hardwood in kitchens is not just acceptable in 2026, it is the prevailing choice in mid-to-high-end remodels. Wood is warmer underfoot than tile, kinder to dropped dishes, and visually unifies kitchens with adjoining living spaces. The practical requirements are a durable finish, prompt cleanup of spills, and protective mats at sink and dishwasher zones. White oak and hickory are particularly good kitchen candidates thanks to their hardness and forgiving grain.
Basements and Below-Grade Spaces
Solid hardwood does not belong below grade, full stop. Engineered hardwood can perform beautifully in a finished basement, provided moisture testing confirms the slab is dry, a proper vapor barrier system is in place, and humidity is controlled year-round. When conditions are marginal, a premium luxury vinyl plank can be the wiser call, and a good contractor will tell you so rather than sell you the wrong product.
Bathrooms and Laundry Rooms
Full bathrooms are the one place we consistently steer clients toward ceramic tile instead. Standing water, steam, and wood are a long-term losing combination. Powder rooms without showers are a gray area where engineered wood can work if you accept the maintenance discipline it demands.
The Hardwood Floor Installation Process: What Happens Step by Step
Knowing what a professional installation looks like helps you evaluate contractors and understand what you are paying for. Here is how a well-run project unfolds from first call to final walkthrough.
Step 1: In-Home Assessment and Measurement
A real estimate starts in your home, not over the phone. The installer measures each space, inspects the existing floor and subfloor, checks for squeaks and soft spots, takes preliminary moisture readings, and identifies complications like out-of-level transitions, stair nosings, or floor vents that need matching wood registers.
Step 2: Product Selection and Project Planning
With site conditions known, product recommendations become meaningful. This is where species, construction, width, grade, and finish get matched to your rooms, your household, and your substrate. Direction of the boards gets decided here too, typically running parallel to the longest wall or the main light source, and always considering joist direction for nail-down installs.
Step 3: Delivery and Acclimation
Flooring arrives days before installation and acclimates under normal living conditions, verified with meter readings as described earlier. This quiet stage is where patient contractors are separated from calendar-driven ones.
Step 4: Demolition and Subfloor Preparation
Existing flooring comes out, fasteners and adhesive residue get cleaned up, and the full prep protocol runs, fastening, flattening, repairing, and installing the appropriate underlayment or vapor retarder.
Step 5: Layout and Installation
The crew snaps working lines, racks out boards from multiple boxes to blend color and grain naturally, and installs using the chosen method. Expansion gaps are maintained at every vertical surface, end joints are staggered, and boards are face-checked so defects never make it into the field of the floor.
Step 6: Trim, Transitions, and Detail Work
Baseboards or shoe molding go back, transition strips get fitted at doorways and dissimilar floors, vents are set, and stair parts are installed where the project includes steps. Detail work is where craftsmanship is most visible, tight miters and clean scribes around door casings tell you everything about a crew.
Step 7: Final Inspection and Walkthrough
The floor gets cleaned, inspected board by board under raking light, and walked with you. You should leave this conversation knowing exactly how to care for the floor and what the workmanship warranty covers.
Site-Finished vs. Prefinished Hardwood: Two Paths to a Finished Floor
Every hardwood floor needs a protective finish, and there are two fundamentally different ways to get one.
Prefinished Hardwood Flooring
Prefinished flooring arrives with a factory-applied finish, typically aluminum oxide urethane, cured under UV light in conditions no job site can replicate. The advantages are speed and durability, rooms are walkable the same day, there is no dust or odor from on-site finishing, and factory finishes are remarkably abrasion resistant.
The trade-off is the micro-bevel at board edges, which creates subtle grooves between planks, and less flexibility to customize color on site.
Site-Finished (Unfinished) Hardwood Flooring
Site-finished flooring is installed raw, then sanded, stained, and sealed in place. The result is a perfectly flat, monolithic surface with no bevels, custom stain matching, and seamless blending with existing floors, which is why it is the method of choice when extending original hardwood in older homes around Malvern and Wayne.
Modern water-based polyurethane finishes have largely closed the durability gap with oil-based products while drying faster, yellowing less, and keeping the natural tone of white oak intact, a big deal for the light, natural looks trending in 2026.
Choosing a Sheen Level
Matte and Ultra-Matte
The dominant look of 2026. Matte finishes hide micro-scratches and dust remarkably well and give wood a natural, oiled appearance without oil’s upkeep.
Satin
The versatile middle ground, a soft glow that suits both traditional and contemporary homes and remains the most requested sheen overall.
Semi-Gloss and Gloss
Formal and dramatic, but shows every footprint and scratch. Best reserved for low-traffic showcase spaces.
Plank Width, Patterns, and Design Choices That Define the Look
Beyond species and stain, a handful of design decisions shape the personality of your floor.
Plank width may be the biggest one. Traditional strip flooring runs 2 1/4 inches wide. Today’s standard has migrated to 5, 6, and 7-inch planks, with widths up to 10 inches in premium engineered products. Wider planks mean fewer seams, a calmer visual field, and a more contemporary feel, they also raise the stakes on moisture stability, which loops back to why wide planks and engineered construction pair so well.
Pattern installations turn a floor into architecture. Herringbone, rectangular boards laid in a broken zigzag, has surged back into American homes and is a signature request in upscale renovations across Gladwyne and Villanova. Chevron cuts board ends at an angle so the zigzag meets in continuous points, reading even more tailored. Borders, medallions, and mixed-width installs offer further ways to make a floor unmistakably custom.
Board length matters more than people expect too. Longer average lengths reduce the visual “chatter” of end joints, one of the quiet markers of a premium product and a premium install.
DIY vs. Professional Hardwood Floor Installation: An Honest Assessment
Plenty of capable homeowners ask whether this is a project they can tackle themselves. The honest answer is, it depends on which project.
A click-lock engineered floating floor in a single rectangular bedroom over a flat subfloor is a realistic weekend challenge for an experienced DIYer with patience and a good saw. The instructions are manageable and the failure modes are mostly cosmetic.
Nail-down solid hardwood across a first floor is a different animal entirely. It requires pneumatic flooring nailers, moisture meters, subfloor correction skills, an eye for racking layout, and the experience to handle the dozen judgment calls that surface in every old house, out-of-square rooms, humps over beams, transitions to tile, stair nosings. Glue-down over concrete raises the difficulty again, because adhesive mistakes are permanent and moisture mistakes are expensive.
There is also the warranty dimension. Manufacturers routinely deny claims on floors installed outside their specifications, and documented professional installation, with recorded moisture readings, is your protection if a product ever fails. When you factor in tool costs, material waste from learning-curve mistakes, and the value of a workmanship warranty, professional installation earns its place in most whole-home scenarios.
How Long Does Hardwood Floor Installation Take?
Timeline questions come up in nearly every consultation, so here is a realistic picture for planning purposes. Actual durations vary with site conditions, but the sequence and proportions hold.
| Project Phase | Typical Duration | What Affects It |
|---|---|---|
| Assessment and product ordering | A few days to 2 weeks | Product availability, custom orders |
| Acclimation on site | 3 to 7+ days | Species, season, HVAC conditions |
| Demo and subfloor prep | 1 to 3 days | Existing floor type, prep scope |
| Installation | 1 to 4 days | Square footage, method, pattern complexity |
| Site finishing (if applicable) | 3 to 5 days | Coats, stain, cure time between coats |
| Ready for furniture | Same day (prefinished) to several days (site-finished) | Finish type and cure schedule |
Two planning notes worth flagging. First, herringbone and chevron patterns roughly double installation labor compared to straight-lay. Second, site-finished floors need cure time before rugs go down, typically a couple of weeks even after furniture returns, ask your installer for the specific schedule for your finish system.
Caring for Your New Hardwood Floors: Maintenance That Actually Works
A quality installation deserves care that protects it, and the good news is that hardwood maintenance is genuinely simple once you separate fact from marketing.
The daily and weekly routine is unglamorous, dry dust mopping or vacuuming with a hard-floor attachment to remove the grit that acts like sandpaper underfoot. Damp cleaning, when needed, means a barely moist microfiber pad and a pH-neutral hardwood cleaner recommended by your finish manufacturer, never steam mops, never vinegar solutions, never wet mopping.
A few habits multiply a floor’s lifespan:
- Felt pads under every furniture leg, replaced when they compress or collect grit
- Walk-off mats at exterior doors, catching sand and salt before they reach the wood, especially through Pennsylvania winters
- Humidity control between roughly 35 and 55 percent, using humidifiers in winter and dehumidification in summer, which protects the wood and, incidentally, your trim, doors, and instruments too
- Prompt attention to spills and pet accidents, since standing liquid is the enemy, not occasional splashes
- Trimmed pet nails and rugs in pivot zones, at the bottom of stairs and in front of the kitchen sink
Long term, remember the renewal advantage that makes hardwood unique. A tired finish can be screened and recoated without full sanding, refreshing protection in a day. And when the day for full sanding and refinishing finally arrives, years down the road, the floor becomes new again, an option no other flooring category can match.
Common Hardwood Installation Mistakes, and How Professionals Avoid Them
Understanding failure modes helps you ask sharper questions of any contractor you interview. These are the mistakes behind most callbacks in this trade.
Skipping moisture testing tops the list. No meter readings before install means nobody knows whether that floor was set up to succeed or fail. Inadequate expansion gaps come next, wood needs room to move at every wall and fixed object, and floors installed tight to the drywall have nowhere to go but up. Ignoring subfloor flatness produces the bouncy spots and squeaks that no amount of finish can hide.
Then there are the visual errors, poor board racking that clusters similar boards from single boxes into blotchy patches, ignored working lines that let rows drift out of straight over a long room, and fastener schedule shortcuts that leave boards loose enough to creak. None of these are exotic problems. All of them are prevented by process discipline, which is precisely what you are hiring when you hire well.
How to Choose a Hardwood Flooring Contractor in Pennsylvania
Every market has a wide range of operators, from meticulous craftsmen to truck-and-a-nailer outfits, and price alone will not tell you which is which. Here is what actually separates them.
Ask every candidate these questions, and pay attention to how specifically they answer:
- Are you licensed and insured, and can you send certificates directly? In Pennsylvania, home improvement contractors must be registered under the state’s HICPA program, and proof of liability and workers’ compensation coverage protects you, not them
- How do you handle moisture testing and acclimation? The right answer includes meters, documented readings, and conditions-based timing, not “we usually wait a couple days”
- What does your subfloor prep include, and is it itemized in the proposal? Vague line items hide future change orders
- Who actually performs the work? Employed crews with a named lead installer beat anonymous subcontracting for accountability
- What warranty covers your workmanship, in writing, separate from the product warranty?
- Can I see recent local projects or speak with recent clients? Local references from Montgomery County, Chester County, or Delaware County tell you the crew knows the housing stock you live in, from 1920s stone colonials to 1990s builder specs
A detailed written proposal, a clear payment schedule tied to milestones, and straight answers to the questions above are worth more than the lowest number on the page. Floors are among the few purchases you will touch every single day for decades, the selection process deserves the same seriousness.
Frequently Asked Questions About Hardwood Floor Installation
What is the best time of year to install hardwood floors?
Any season works when the process is right. What matters is that the home’s HVAC is operating at normal living conditions during acclimation and installation, so the wood equilibrates to the environment it will actually live in. Winter installs in Pennsylvania simply require attention to indoor humidity, since heated air runs dry.
Can hardwood floors be installed over existing flooring?
Sometimes. Floating engineered floors can often go over well-bonded existing surfaces if height and flatness allow. Nail-down solid wood generally requires removal down to the structural subfloor. Every layer left in place raises floor height, affecting doors, appliances, and transitions, which is why this call gets made during the in-home assessment, not by rule of thumb.
Is hardwood flooring a good choice for homes with dogs?
Absolutely, with smart choices. Harder species like hickory or white oak, character-grade boards that camouflage marks, matte finishes that hide micro-scratches, and trimmed nails together make wood and dogs happy housemates. Millions of Pennsylvania households prove it daily.
How soon can we walk on the new floor?
Prefinished and floating floors, typically the same day. Glue-down floors, after the adhesive’s specified cure window. Site-finished floors, socks-only walking usually within a day of the final coat, furniture after several days, rugs after the finish fully cures, your installer will give exact numbers for the specific finish system used.
Does hardwood flooring increase home value?
Consistently, yes. Real estate professionals routinely rank hardwood among the features buyers in the Philadelphia suburbs actively search for, and appraisers treat quality wood floors as a durable upgrade rather than a trend purchase. Beyond resale math, it is one of the few improvements you enjoy every day you own the home.
What is the difference between hardwood installation and hardwood refinishing?
Installation puts new flooring in place. Hardwood refinishing renews existing wood by sanding away the old finish and applying new stain and sealer. If your current floors are solid wood with life left in them, refinishing may deliver a dramatic transformation without replacement, and an honest contractor will assess which path serves you better.
Conclusion: A Floor Done Right Is a Decision You Only Make Once
Strip away the product catalogs and the trends, and hardwood floor installation comes down to a handful of principles applied without shortcuts. Match the construction to the conditions. Respect moisture at every stage. Prepare the subfloor like the finished floor depends on it, because it does. Install with discipline, finish with care, and maintain with simple, consistent habits.
Homeowners across Southeastern Pennsylvania have trusted these principles in houses of every age and style, from historic properties in Wynnewood to new construction in Royersford. The floors that result do not just survive daily life, they get better looking as the years soften them into the character of the home.
If you are weighing new hardwood floors in 2026, start with a conversation and a proper in-home assessment. Bring your questions, we have answered every one of them before, and the right plan for your home starts with the specifics of your home.
Ready to talk through your project? Request your free assessment through our contact page or call our team directly at (619) 361-7978. We will walk your space, test your conditions, and give you a straight answer about the best path forward.
Find Expert Hardwood Floor Installation Near You in Southeastern Pennsylvania
Wood flooring rewards local knowledge. The humidity patterns of the Schuylkill and Main Line corridors, the quirks of century-old subfloors, and township permit expectations all shape how a project should be planned. Obsidian Flooring installs hardwood floors throughout Montgomery County, Chester County, and Delaware County, with dedicated teams serving the communities below.
If your home is in one of these areas, visit your local service page to see how we approach projects in your neighborhood: